CALDIERO (1805) Battle Report
For players seeking a "fair and balanced" historical scenario, Caldiero is about as close as it gets. The Austrians enjoy numerical superiority and defensible ground, while the French enjoy their typical advantage in maneuverability. The battle is a head-on collision where both sides begin the the game with most of their forces available immediately. After setting up the tabletop you begin to realize how crowded a Napoleonic battlefield could be--over 50,000 men fighting in roughly 5 square miles. The historical troop density is amazing to consider....
 |
10:00am: The opposing armies deploy about two miles apart in a thick morning fog, unable to see each other beyond 300 yards. The Austrian army concentrates in the valley between Caldiero and the Adige River. Archduke Charles positions himself on the heights above Caldiero.
To mask their own intentions, the French deploy in a tight formation. Hesitant to tip their hand too early in the battle, the French defer the initiative to the Austrians, who advance cautiously. 10:30 am: Both sides continue to probe forward in the fog. The French continue to advance in a dense, central formation within a narrow one-mile front. The Austrians, by contrast, are stretched over a four-mile front. |
11:00am: The Austrians continue their broad advance, passing through the town of Caldiero. On the heights above the town, Archduke Charles waits with his artillery reserve and Simbschen's infantry division. With the fog nearly lifted, the French maneuver strategy becomes clear. French infantry columns begin rapidly angling toward the high ground. A cavalry screen presses toward the Adige River to slow down the main Austrian advance.
|
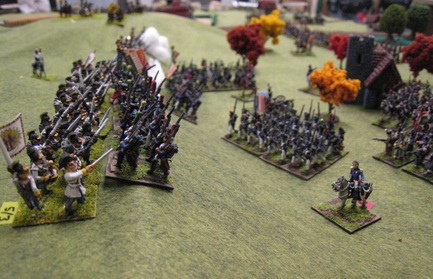
11:30am: Eager French infantry race up the ridge to confront the Austrian defenders head-on. Austrian batteries exact a painful toll with point-blank cannister fire, but the weight of French numbers drives back Simbschen's isolated division. Sensing the danger to his far right flank, Archduke Charles calls up his grenadier reserves. But the grenadiers are still over a mile away, leaving the fate of the ridge in question. [Right: French infantry begin storming the heights] On the opposite flank near the Adige River, the Austrian advance continues, but at a slower pace. The French cavalry screen falls back toward the town of Gambion, where infantry and artillery are busily fortifying the streets. |
 |
12:00pm: A combined arms effort of French cavalry and infantry drive the Austrians from the heights. Now, only Archduke Charles and his heavy artillery reserve remain on the ridge. Where is General Argentau with the grenadier reserve?
12:30pm: Just as the entire Austrian right flank is on the verge of collapse, Argentau arrives with the grenadiers. With the situation temporarily stabilized, the archduke turns his attention to his main force converging on Gambion. Here, the retrograding French are finally ready to make a stand.
1:00pm: Vogelsang's division--over 9,000 men--attempts to drive the hated French from Gambion. Only the point-blank fire of two French batteries help stem the Austrian attack. On the opposite flank, Argentau and Charles personally intervene to inspire their men against overwhelming odds.
1:30pm: Vogelsang's second surge finally carries Gambion, driving the French outside the town. Despite this moral victory, the main Austrian advance has been ponderous and time-consuming. And while the French are driven back, they remain in good order. Such is not the case atop the heights, where Archduke Charles is forced to flee for his life. Argentau's reserve is swamped by the French flanking effort and the wing crumbles. French chasseurs overrun the Austrian heavy reserve batteries.
2:00pm: [See Below Right] With the Austrian army in disarray, Massena commits his own grenadier reserves to the center of the battlefield, marching toward Caldiero. The Austrians still hold Gambion in strength, but the French advance threatens to drive the Austrian army into the waters of the Adige River.
2:30pm: Archduke Charles begins withdrawing his army from the field to prevent his surviving men from being trapped against the river. The result of the battle is decisive--French control over northern Italy is now secured.
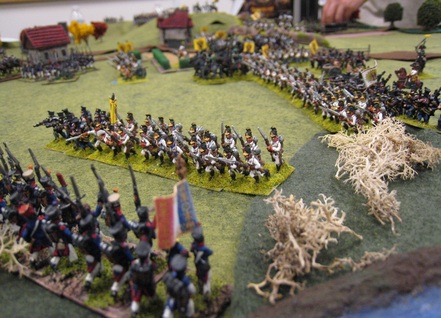 Near 12:00pm, the main Austrian advance drives the French screen back toward the fortified town of Gambion. |
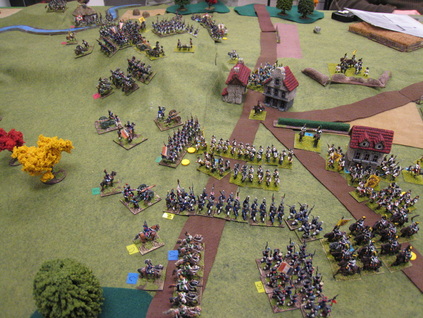 By 2:00pm the Austrians have driven the French from Gambion (right), but atop the heights (left) a massive French flanking maneuver has vaporized a wing of the Austrian army. |
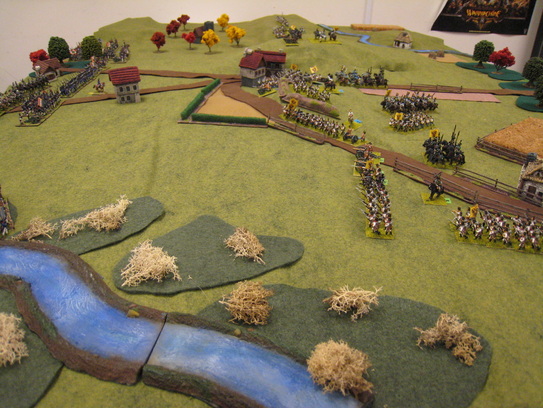
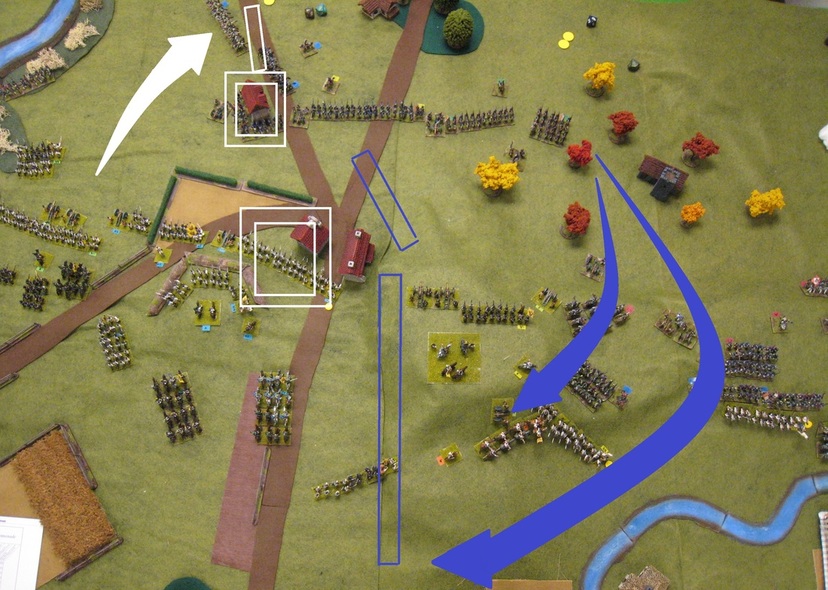
Aerial view of the battlefield at 1:00pm...Final positions at 2:30 are also illustrated
Victory Objectives:Our battle ended after the 2:30pm turn, by which time the Austrians suffered over 30% casualties, triggering the scenario's automatic end rule. What had been a close-run affair until noon turned into a rout by early afternoon.
Historically, both sides lost roughly 5,000 men. In our battle the French lost 4,000, while the Austrians lost over 16,000!
|
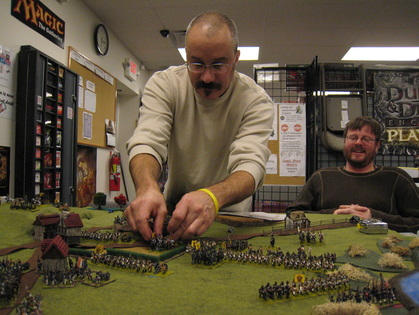 Archduke Charles [Tony], drives his men forward during the 12:00pm turn, while General Nordmann [Keith] seems to be enjoying himself. |
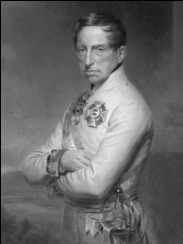
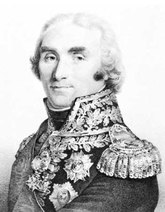
Archduke Charles' Report
Mea culpa, mea culpa!
This will not be my usual “After Action” report but rather a discussion--a confession if you will--of my muddled thought process and poor state of planning resulting in a disastrous rout.
Two mistakes, both mine, resulted in an enormous disaster for the Austrian army. This pair of sins did I commit upon my initial deployment and they grew to terrible fruition wrecking our army and any chance of victory.
I assumed that while my right flank on the high ground was exposed that it was defensible and that they would likely hold, if needed until either I reinforced them or launched a counter-attack of my own to relieve any pressure upon them. Here the astute observer will see the root of my 2nd mistake.
The 2nd being that rather than plan to initiate action and control the tempo I chose an “either/or” plan to counter my opponent. In truth by allowing the French to dictate the course or direction of the battle (the only factor which I may have claimed for myself) I gave up any initiative and was then forced to react with an army less capable of rapid, complex battlefield maneuvers than my opponent thus were the Austrians always playing “catch up.” In addition having planned for two options I found myself momentarily grasping at both choices when in reality I needed to decisively commit to a course of action as my hesitation only added to the balkiness of my cumbersome brigades.
Had I decided during deployment to take some action to lure the French into advancing upon the point of my choosing or initiated some offensive action immediately, thus forcing them to react, then at least they would have been moving with their famed rapidity in response to my actions and I would have perhaps retained the strategic initiative long enough to bring my greater numbers to bear to my advantage. It was as bad a day as the Austrians have had.
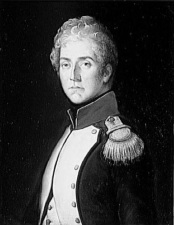
Marshal Massena's Report
I was somewhat intimidated at the beginning of the battle. The enemy held advantages in numerical superiority and defended favorable ground. The French advantages were speed and the ability to deploy over a narrow front. I arrayed our forces in a tight bunch and spent the first few turns trying to lure the enemy closer. By the time the morning fog lifted, Steve and I were driving our infantry columns on a wide flanking effort against the high ridge.
French speed worked two-fold: On our left flank we raced our attack forward, while on our right flank we continued to retreat and draw the main Austrian army ahead without engaging them. We hoped to avoid an engagement with the main Austrian body as long as possible. By the time the enemy caught up with us at Gambion, our own flanking effort had overwhelmed the opposite Austrian flank and rolled up their line.
French speed worked two-fold: On our left flank we raced our attack forward, while on our right flank we continued to retreat and draw the main Austrian army ahead without engaging them. We hoped to avoid an engagement with the main Austrian body as long as possible. By the time the enemy caught up with us at Gambion, our own flanking effort had overwhelmed the opposite Austrian flank and rolled up their line.
General Molitar's Report
Upon my arrival at the gaming table, Greg, Tony and Keith had already been on the field for three turns, engaging in fog-enshrouded maneuver. I was priviledged to join the French side and command three divisions: Molitar's infantry, Mermet's cavalry, and Partonneaux's reserve grenadiers. These three units were spaced out across the battlefield, and thus their respective actions can be discussed separately:
MOLITAR--As Greg had already positioned this division at the forefront of the units attacking the high ground above Calierio, I decided to bring the weight of our forces to bear as soon as possible and charged directly into the defending Austrian lines. The dice would be with Molitar's division all night, and they immediately began to whittle down the Austrian numbers and push them back. This was the first of two times when I failed to follow-up as much as, in retrospect, I should have. While I was afraid that a brigade getting too far ahead of its brother units would leave it vulnerable to isolation, by the end of the night I realized the real chances of this happening were fairly small.
MERMET--For all the glory seized by Molitar's Division, Mermet and his horses were left to grasp only humiliation. As this was my first time playing a Napoleonic game of any type, I was at a complete loss as to how to use heavy cavalry. As a result I basically had them hold a line stretching from Gambion to make an impressive show in the teeth of Keith's approaching infantry. The show was nice for awhile, before Keith's infantry and Tony' cavalry plowed into my line and forced one brigade to rout off the table. The second brigade immediately fell back, and while I planned a counter-charge, the men refused to obey. So ended Mermet's day. Clearly I got zero use out of these units and just about anything else I would have done would likely have been more productive. That being said, I still have no diea what I should have done to get a markedly better result.
PARTONNEAUX--Stationed as they were in the middle of the French forces, my grenadiers were poised to serve as the pivot of Greg's planned "pinwheel" maneuver and ready to assist in either the push on the high ground or the defense of our lines near Caldiero. In the end, they did a bit of both. Though I did not do as much damage with this division as Molitar's, I think I am most pleased with my management of it. I seemed to commit the right troops at the right time to the right situations, and isn't that really what we all want to do? [Besides, of course, crushing your enemies, seeing them driven before you and hearing the lamentations of their women.]
Overall, this battle was a very enjoyable intro to the world of Napoleonic gaming and I look forward to the next time we run one of these scenarios.