Austerlitz FROZEN STREAMS & MARSHESIf you're going to make the effort to stage an Austerlitz scenario, you want to make sure the battlefield looks the part. Fought in December 1805, the field at Auserlitz was not covered in snow, but did feature frozen streams, marshes, and ponds. A famous incident occurred late in the battle when retreating Russian infantry fled across a small frozen lake, only to be drowned as incoming French artillery shells broke the ice.
Frozen streams and marshes can also be used at Eylau, Berezina, and a handful of other Napoleonic battles. |
COST: $8
|
#1. The Hard Part

The single most difficult part of this tutorial is the first step: Cutting out the streams and ponds from the plastic sheet. To begin the project you'll need to visit a local hardware store and find frosted privacy plastic (it runs about $7 for a 24" by 36" sheet). The plastic is thin but sturdy and comes with a rough texture on one side. The variety I purchased is called "Cracked Ice" and when seen close up, looks like the picture to the left.
Cutting the plastic is a real chore. It requires heavy scissors or tin snips, patience, and some practice. Take your time when cutting, because if you cut too quickly the brittle plastic will break apart and crack along the edges. There is a learning curve here, as you may accidently shatter your first few pieces. The key is to take your time and use the right tool for the job--standard household scissors do not work well.
Cutting the plastic is a real chore. It requires heavy scissors or tin snips, patience, and some practice. Take your time when cutting, because if you cut too quickly the brittle plastic will break apart and crack along the edges. There is a learning curve here, as you may accidently shatter your first few pieces. The key is to take your time and use the right tool for the job--standard household scissors do not work well.
#2. Painting the Underside
Unlike the previous step, this is mind-numbingly simple. Select a mid-tone gray color and paint the bottom of the plastic pieces you've cut. Paint the smooth side as the bottom--you want the rough texture on the top to represent frozen water. But before you paint the smooth plastic, be sure to roughen the surface with coarse sand paper. Paint (for those who don't know) doesn't stick well to smooth plastic surfaces!
Feel free to experiment with various colors. I tried shades of blue but found them too colorful for a frozen body of water. Gray looks the best. Because the frosted plastic is somewhat opaque, whatever color you paint will not show up too boldly.
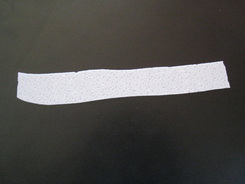
If you're working on large amount of stream length and several ponds at once, I'd suggest saving time by spray-painting them in one batch. [above left: a section of frozen river before painting]
Feel free to experiment with various colors. I tried shades of blue but found them too colorful for a frozen body of water. Gray looks the best. Because the frosted plastic is somewhat opaque, whatever color you paint will not show up too boldly.
If you're working on large amount of stream length and several ponds at once, I'd suggest saving time by spray-painting them in one batch. [above left: a section of frozen river before painting]
#3. Forming the River Banks
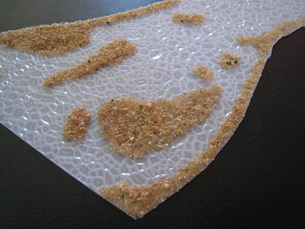
If you're feeling lazy, you could stop right now and put your new frozen streams into action. But for those feeling more ambitious, you may want to dress up the terrain with more realism. To create dirt banks on the edges of your streams and ponds, apply a generous bead of craft glue (or super glue, if you want this thing to last the test of time) along the outer edges of the plastic. Then sprinkle gravel or sand on the glue and wait for everything to dry.
Once the glue has dried, carefully paint and drybrush these river banks with shades of brown. The final effect is quite impressive!
#5. Finishing the Marshes
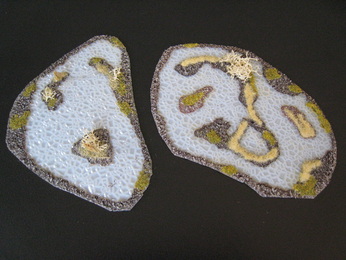
Behind the Russian position along the Pratzen Heights, a large frozen marsh was a prominent battlefield feature. Frozen marshes were also notably present at Berezina in 1812.
To make the marshes stand out from the streams and ponds, you should take the time to add a few additional touches. Spread small areas of glue and gravel not just along the banks, but also inside the marsh. Add tall grass or reeds, as well. You can create reeds by cutting old broom bristles and glueing them upright. Use your imagination when adding flock or bits of lichen to represent scrub foliage. Review the photo slideshow below to see how my marshes turned out.