FUENTES de ONORO (1811) Battle Report
To begin by stating the obvious--this website does not feature any scenarios for the Peninsula. For many years, no one in our club had British/Spanish/Portuguese miniatures, so the Peninsular Campaign was off-limits. But very recently, we've seen the return of the British, allowing us to fight a modestly-sized scenario for Fuentes de Onoro. I found the scenario for free at the old Age of Eagles Yahoogroup.
By 1811, the French were driven from Lisbon and in full retreat into Spain. Wellington's army proceeded to capture a series of key frontier citadels, including a siege of Almeida. Hoping to relieve the fortress and bring Wellington to battle, Marshal Massena assembled an army of almost 50,000 men for a counter-attack. Wellington met the French at Fuentes de Onoro.
By 1811, the French were driven from Lisbon and in full retreat into Spain. Wellington's army proceeded to capture a series of key frontier citadels, including a siege of Almeida. Hoping to relieve the fortress and bring Wellington to battle, Marshal Massena assembled an army of almost 50,000 men for a counter-attack. Wellington met the French at Fuentes de Onoro.
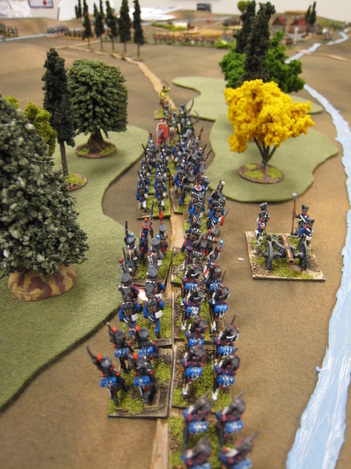
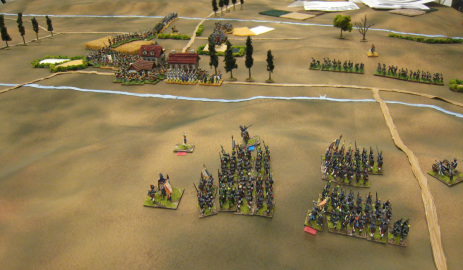 The right wing of Massena's army, three divisions, begins to advance into the valley, with the village of Fuentes de Onoro appearing in the distance. |
9:00am: Our scenario begins at 9:00am on May 5, the third day of the historical engagement. Wellington's British-Portuguese force of some 30,000 men is deployed between two small rivers, anchored at the village of Fuentes de Onoro. This is a very sound defensive position.
Only a third of Massena's army begins deployed on the field, and even these troops are separated on opposite flanks. 9:30 am: As additional French troops trickle onto the field, Massena directs both wings of his army to threaten the British flanks. This strategy will effectively bypass the heart of the Anglo-allied defense at Fuentes de Onoro, but leave the French army divided. |
10:00am: In response to the French movement, Wellington takes advantage of his interior position to thin out his center and bolster the extreme ends of his line. On the far left, General Crauford's British division actually does the unexpected--he advances toward the oncoming French! Desultory shots are traded along the river bank, but Massena is clearly surprised to find his enemy making a local attack.
|
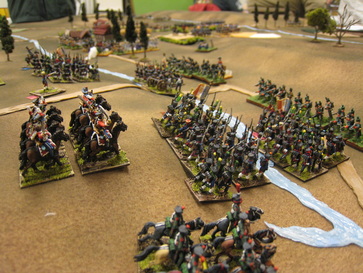
10:30am: Although outnumbered, Crauford's men unleash a devastating volley of fire, decimating d'Elron's Corps and stunting the French entire French attack. [Right: Crauford's British defend the Don Casas River] 11:00am: Massena helps reorganize d'Elron's IX Corps for a renewed effort, and with the help of Fournier's cavalry, the French deliver a powerful counter-attack. The British left flank, despite their earlier success, is suddenly in grave danger of being overrun. To make matters worse, the bulk of Massena's army finally begins arriving to the field, including Loison's VI Corps. |
 |
11:30am: Crauford's Division continues to disintegrate, in full retreat away from the Don Casas River. Wellington thins the center of his line to send two brigades to shore up the crumbling British left. But Massena and d'Elron have paid dearly for their success, already losing almost 3,000 casualties in the morning affair. Only a mile to the rear, Lepic's Old Guard cavalry waits in reserve to deliver what could be the coup de grace, but Lepic refuses to advance without Bessieres, his nominal commander. Our scenario has a special rule to reflect this historical command-confusion, and the French play fails to roll successfully enough to release Lepic's much-needed shock troops.
On the opposite end of the battlefield, Montbrun's cavalry and elements of Junot's VIII Corps threaten the extreme British right flank. Maneuver and counter-maneuver have made this flank a side-show to the bloody battle raging at the other end of the field. Meanwhile, Loison's VI Corps continues to approach from the center, still two miles from the front lines.
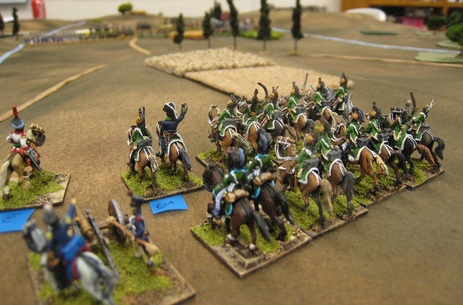 Throughout the morning, Montbrun's cavalry demonstrate against the British right flank, but the French lack the strength to engage. This part of the battlefield is a stalemate. |
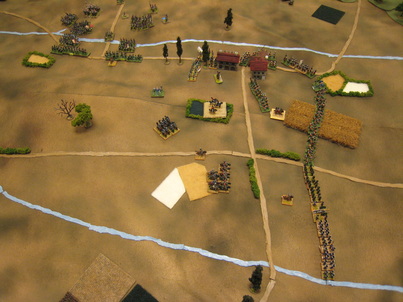 The overhead view of the battle around 11:00am. To the left, d'Elron's corps crosses the Don Casas River. The rest of Wellington's defensive position curves into an upside-down "L" formation. |
12:00pm: With the main French body still approaching from a distance, Wellington realizes that the time is right to deliver a swift counter-attack on his crumbling left flank. The British detach forces from their center to crash into d'Elron's exhausted corps. The fight rages back-and-forth, but the French are weary and bloodied, looking for any available fresh reserves. Why won't Lepic's Old Guard cavalry assist? Where is Loison's corps, with it's three large divisions?
12:30pm: One more firm push from Wellington leads to the utter collapse of d'Elron's IX Corps. The French are broken, streaming back across the river in disorder. Casualties are frightful. On the horizon, Loison's reinforcements are finally deploying into line to enter the battle, but it is too late for Massena's right wing.
12:30pm: One more firm push from Wellington leads to the utter collapse of d'Elron's IX Corps. The French are broken, streaming back across the river in disorder. Casualties are frightful. On the horizon, Loison's reinforcements are finally deploying into line to enter the battle, but it is too late for Massena's right wing.
Victory Objectives:We ran out of time at the store to fight the last half of the battle, which would have been quite interesting to resolve. Although the French were badly bloodied, the majority of Massena's army had not yet fired a shot.
But there is no doubt that our morning engagement represented a clear British victory. Wellington suffered 2,500 casualties while inflicting almost 6,500 on the French. General Conroux, one of d'Elron's division commanders, also fell mortally wounded. Historically, Massena believed he might have won the battle had Lepic's guard cavalry obeyed his orders to advance. True to form, a very similar situation occurred in our scenario. There was a clear moment in the late morning when the French lacked sufficient reserves to exploit their success and Lepic's light horse might have turned the tide....
|
 Loison's corps marches down the road toward the sound of the guns...but most of the French army did not arrive in time for our scenario to unfold. |